sabato 29 aprile 2017

26 Great Nail Art Ideas: Work Appropriate Manicure

Work Appropriate Manicure
** Testo in italiano in fondo alla pagina **

Today theme for  26 Great Nail Art Ideas challenge is work appropriate manicure.

In my opinion this means sober manicure with moderate decorations just on one nail.

Work Appropriate Manicure


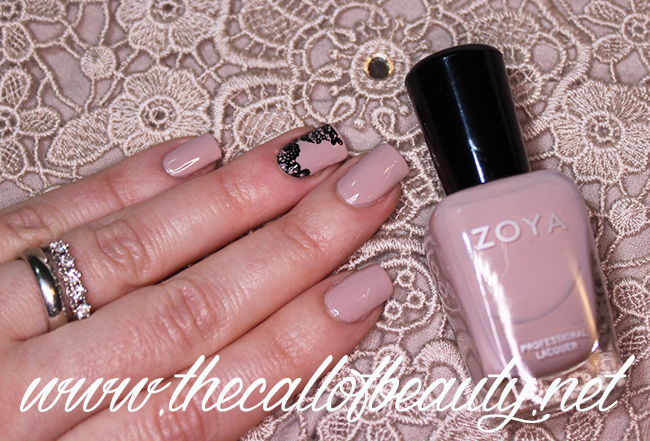
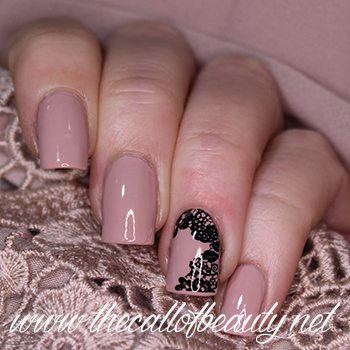
For my version of a work appropriate manicure I chose a nude polish that matched my complexion.

I stamped in black from MoYou London Tourist collection 21 plate the lace pattern.

nail plate


I like this side image but I couln't stamp it the way I needed despite the clear stamper 😓.

Work Appropriate Manicure


I protected my manicure with a layer of top coat.

Do you find it appropriate for work?😉

Work Appropriate Manicure


Materials:

Work Appropriate Manicure

  • Nail polish: Zoya Kennedy
  • Sstamping poish: Born Pretty black
  • Stamping plate: MoYou London Tourist collection 21
  • Top Coat: Seche Vite
  • stamper and scraper
 ***
Work Appropriate Manicure


Il tema di oggi per la sfida delle 26 Great Nail Art Ideas è una manicure adatta al lavoro.

Secondo me in questo genere rientrano tutte le manicure poco appariscenti e con decori discreti, da eseguire al massimo come vezzo su una sola unghia.

Per realizzare la mia versione di una manicure adatta al lavoro ho scelto uno smalto nude che si abbinasse alla mia carnagione.

Poi dal disco MoYou London Tourist collection 21 ho stampato solo sull'anulare il motivo a pizzo in nero. Questo disegno laterale mi è piaciuto molto ma, nonostante abbia usato lo stampino trasparente, non sono riuscita a centrarlo come volevo 😓.

Ho protetto tutto con una passata di top coat.

Che dici, la trovi adatta per il lavoro? 😉

Materiali usati:
  • Smalto: Zoya Kennedy
  • Smalto per stamping: Born Pretty nero
  • Disco per stamping: MoYou London Tourist collection 21
  • Top Coat: Seche Vite
  • stampino e raschietto

giovedì 27 aprile 2017

Throwback Thursday #4: Dusty Dentelle Manicure

Dusty Dentelle Manicure
** Testo in italiano in fondo alla pagina **

From some Thursday I am showing my old nail art that I did one or two years ago in the same period of the year.

I enjoy to see again what I did.

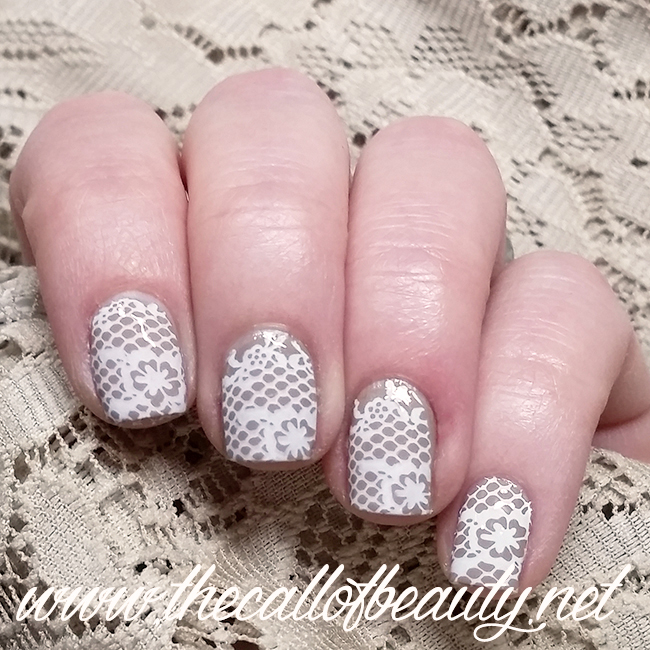
Last year I did a taupe neutral nail art with a delicate print.

The lace is always nice on nails.

If you wanna know all details about this nail art you can find the original post at this link.

***

Da alcuni giovedì mostro le mie nail art di uno o due anni fa realizzate nello stesso periodo dell'anno.
Mi piace vedere dove ero e cosa ho realizzato.

Lo scorso anno mi sono dedicata a una nail art nei toni tortora con una stampa delicata.

Il pizzo sulle unghie è sempre di grande effetto.

Se vuoi scoprire tutti i dettagli di questa manicure, li puoi trovare nel post originale a questo link.


martedì 25 aprile 2017

Twinsie Tuesday: Pusheen Reads a Book Nail Art

 Pusheen Reads a Book Nail Art
** Testo in italiano in fondo alla pagina **

 Today theme for Twinsie Tuesday group is inspired by a Book.

This time I didn't follow the rules because I would like to use my new Harunouta plate with kittens, among which you can find a Pusheen that reads a book.

 Pusheen Reads a Book Nail Art
 
I love manicure with sweet kittens, do you remember my nail art inspired by my cat Akim?

For my Pusheen reads a book nail art I started with a purple base.

 Pusheen Reads a Book Nail Art
 
Then I created a sticker with Pusheen from Harunouta L-015 plate and I applyed it on my middle finger.

Harunouta-L015

On my ring finger I stamped some paws.

I protected my manicure with a layer of top coat.

 Pusheen Reads a Book Nail Art


Materials:

 Pusheen Reads a Book Nail Art

  • Nail polishes: Kiko 314, 329 and 355
  • Stamping polish: Born Pretty black
  • Stamping plate: Harunouta L-015 
  • Top Coat: Seche Vite
  • stamper: Born Pretty
*** 
 Pusheen Reads a Book Nail Art

Il tema per oggi del gruppo Twinsie Tuesday è ispirato da un libro.

Questa volta non ho seguito il tema alla lettera perchè volevo usare uno dei miei nuovi dischi Harunouta con tantissimi gattini, tra i quali spunta Pusheen che legge un libro.

Adoro le manicure con teneri gattini, ricordi questa nail art ispirata al mio gatto Akim?

Per la manicure con Pusheen che legge sono partita da una base viola stesa in due passate.

Poi ho creato uno sticker con l'immagine di Pusheen dal disco Harunouta L-015 e lo ho applicato sul medio.

Sull'anulare ho stampato le zampette.

Ho protetto tutto con una passata di top coat.

Materiali usati:
  • Smalti: Kiko 314, 329 e 355
  • Smalti per stamping: Born Pretty nero
  • Disco per stamping: Harunouta L-015 
  • Top Coat: Seche Vite
  • stampino: Born Pretty

sabato 22 aprile 2017

Nail Crazies Unite: Pastel Dahlia - NCC: Spring #2

Pastel Dahlia Nail Art
** Testo in italiano in fondo alla pagina **

Today theme for Nail Crazies Unite challenge is pastel floral.

I love floral manicure for spring, when you can feel the sun on your skin and the buds bloom.

Pastel Dahlia Nail Art


For my pastel floral nail art I chose some water decals from Nicole Diary.

Luckily I applyed a white base underneath because these decals have a white background instead of a clear one and I noticed it when I soaked them in water 😵

Pastel Dahlia Nail Art


I really like Nicole Diary decals (I used them before in this nail art), they are so wide that I can use one for two nails, so I can do two complete manicures with just a set.

As my accent I applyed a purple microglitter polish that matched with the dahlia colors.

I applyed top coat to protect my nail art.

Pastel Dahlia Nail Art
 
Materials: 

Pastel Dahlia Nail Art
  • Nail Polishes: China Glaze Snow and We Got the Beet
  • Nail Decals: Nicole Diary 05
  • Top Coat: Seche Vite
  • tweezers
  • water
***
Pastel Dahlia Nail Art

Il tema di oggi per il gruppo Nail Crazies Unite sono i fiori pastello.

Io adoro questo tema per la primavera, quando si sente il tepore dei primi raggi di sole e le gemme cominciano a sbocciare.

Per la mia nail art floreale pastello ho scelto delle decalcomanie ad acqua Nicole Diary.

Fortunatamente avevo steso una base bianca sotto perchè queste decalcomanie non sono su fondo trasparente ma bianco e me ne sono accorta solo dopo averle sciolte in acqua 😵

Le decalcomanie Nicole Diary mi piacciono molto (le avevo già usate in questa nail art) perchè sono molto grandi e con una soltanto riesco a coprire due unghie, quindi ogni set mi basta per due manicure complete.

Come accent ho invece applicato uno smalto viola microglitter che riprendesse i colori delle dalie del motivo floreale.

Ho applicato il top coat per proteggere tutto.

Materiali usati: 
  • Smalti: China Glaze Snow and We Got the Beet
  • Decalcomanie ad acqua: Nicole Diary 05
  • Top Coat: Seche Vite
  • pinzette 
  • acqua


giovedì 20 aprile 2017

Throwback Thursday #3: Daisies Manicure

Daisies Manicure
** Testo in italiano in fondo alla pagina **

What nail art did I wear one year ago?

I just bought a China Glaze polish from spring 2016 collection and I added some daisy pattern and maxi glitters.

If you wanna know all details about this nail art you can find the original post at this link!

***
Che nail art indossavo un anno fa circa?

Avevo appena comprato uno smalto China Glaze della collezione primaverile 2016 e lo avevo abbellito con un decoro di margherite e con delle paillettes.

Se vuoi conoscere tutti i dettagli trovi il post originale a questo link!


sabato 15 aprile 2017

26 Great Nail Art Ideas: Easter Plaid

Easter Plaid Nail Art
** Testo in italiano in fondo alla pagina **

Today prompt for 26 Great Nail Art Ideas Challenge is pastel to bold gradient with something on top.
I did this theme for my Easter 2017 nail art.

Easter Plaid Nail Art


I looked for three pink polishes, from pastel pink to fuchsia and I applyed them with a sponge.

Easter Plaid Nail Art

Then I stamped a plaid pattern in white from Born Pretty BP-L041 plate, it has so many plaids!

stamping plate


From MoYou London Festive Collection 09 plate I stamped in black Happy Easter on my ringfinger.
Maybe it was better on the center on the nail 😅

On my middle finger I applyed a decal with a cute rabbit.

Easter Plaid Nail Art


To even the gradient I simply applyed a layer of top coat.

Easter Plaid Nail Art

Materials:

Easter Plaid Nail Art

  • Nail polishes: Kiko 288, 289 and 376
  • Stamping Polishes: Born Pretty black and white
  • Stamping Plates: Born Pretty BP-L041and MoYou London Festive Collection 09
  • Water decals: HOT-268 
  • sponge
  • stamper and scraper
  • water
  • tweezers
***
Easter Plaid Nail Art

Il tema di oggi per la sfida delle 26 Great Nail Art Ideas è una manicure sfumata dal pastello ai colori forti con qualcosa sopra.

Ho realizzato questo tema nella mia nail art per Pasqua 2017.

Ho trovato tre tonalità di smalto rosa, dal rosa pastello al fucsia acceso e le ho applicate sfumandole con la spugnetta.

Poi ho stampato in bianco una fantasia plaid dal disco Born Pretty BP-L041 che ne contiene davvero tante.

Dal disco MoYou London Festive Collection 09 ho stampato in nero la scritta Happy Easter sull'anulare, forse sarebbe stato meglio un pò più al centro dell'unghia 😅

Sul medio invece ho applicato una decalcomania con una tenera coniglietta.

Per uniformare bene lo sfumato mi è bastato applicare una passata di top coat.

Materiali usati:
  • Smalti: Kiko 288, 289 e 376
  • Smalti per stamping: Born Pretty black and white
  • Dischi per stamping:Born Pretty BP-L041and MoYou London Festive Collection 09
  • Decalcomanie: HOT-268 
  • spugnetta
  • stampino e raschietto
  • acqua
  • pinzette


giovedì 13 aprile 2017

Throwback Thursday #2: Easter Eggs

Easter Nail Art
** Testo in italiano in fondo alla pagina**

Throwback Thursday again! This the day when I take I look to my old post of the same period of the year.

Next Sunday will be Easter, so I chose last year Easter nail art.

You can find the original post with all the list of materials at this link.

I used a pastel speckled polish and advanced stamping technique for colorful eggs.

I can take inspiration and think about my next Easter mani!

***

Siamo di nuovo a giovedì, il giorno in cui guardo al passato e ti ripropongo una mia nail art dello stesso periodo dell'anno ma di uno o due anni fa.

Visto che domenica sarà Pasqua, ho scelto la mia nail art di Pasqua dello scorso anno.

Trovi il post originale con la descrizione dei prodotti usati a questo link.

Uno smalto pastello con effetto speckled (glitter neri opachi) e tecnica advanced stamping per le uova colorate.
Meglio prendere ispirazione mentre penso a come fare le mie unghie per questa Pasqua!

martedì 11 aprile 2017

Twinsie Tuesday: Star Wars Darth Vader - Inspired by a Movie

Star Wars Nail Art
** Testo in italiano in fondo alla pagina **

Today theme for Twinsie Tuesday group is inspired by a movie.

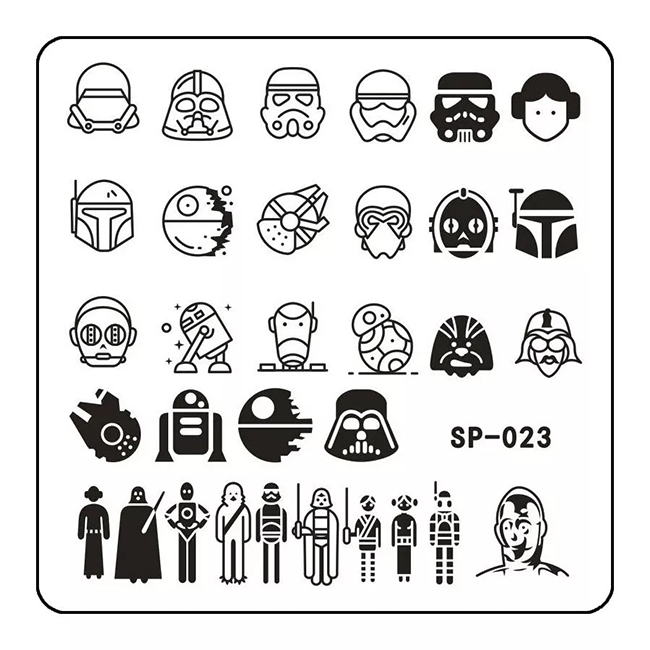
Some days ago I bought a no brand Star Wars themed stamping plate to be ready for next episode that will be released in December and I decided to use it immediately!

Star Wars Nail Art


For this nail art I searched inspiration on Pinterest (if you are curious about my pins you can have a look here) and I found this beautiful nail art by Mademoiselle Emma. She's a french girl with a cute blog that is worth to follow.

stamping plate

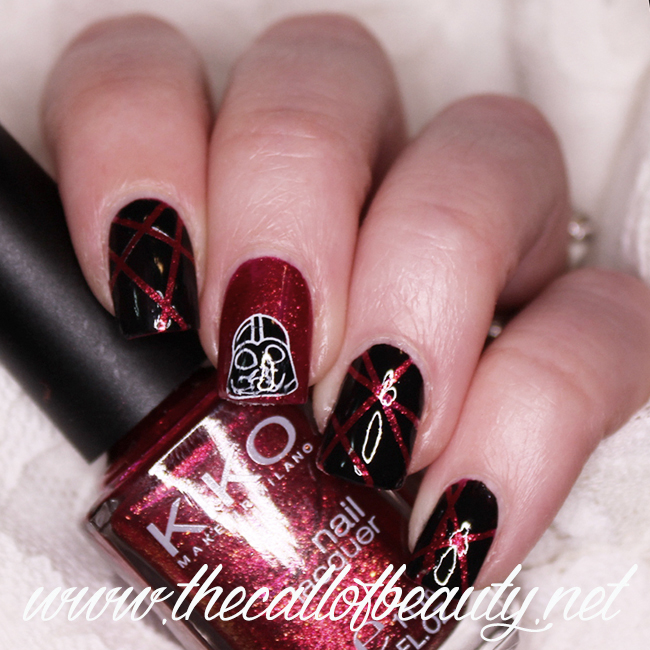
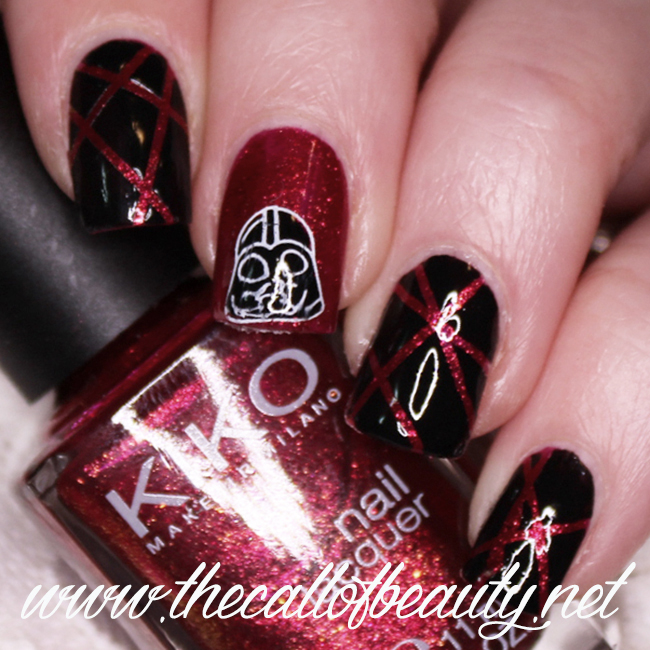
I applyes a microglitter red base, you can find the swatch at this link. It was perfect for laser beam!
When it dried I applyed the striping tape. I worked one nail at a time and I applyed the black polish over and removed the tape.

Star Wars Nail Art

On my middle finger I applyed with advanced stamping the mask of Darth Vader..

I protected my nails with a layer of top coat.

Star Wars Nail Art


Materials:

Star Wars Nail Art
  • Nail polishes: Kiko 493, Kiko Perfect Gel Duo 684 Black
  • Nail stamping polish: Born Pretty white
  • Nail stamping plate: SP-023
  • Stamper: Born Pretty
  • Top Coat: Kiko Gel Perfect Duo
  • Tweezers
  • Striping Tape
*** 
Star Wars Nail Art

Il tema per questa settimana del gruppo Twinsie Tuesday è ispirato da un film.

Da poco ho acquistato un disco per nail stamping dedicato a Star Wars con l'intento di avere le unghie preparate per il prossimo episodio in uscita a dicembre, ma visto il tema ho deciso di anticiparne l'uso!

Per la mia nail art ho fatto un pò di ricerche su Pinterest (se vuoi sbirciare le mie bacheche le trovi qui) e ho trovato questa bellissima nail art di Mademoiselle Emma, è una ragazza francese con un blog molto carino che vale la pena di seguire.
Ho applicato una base rosso microglitter, trovi lo swatch di questo smalto a questo link. Questo colore è perfetto per i raggi della spada laser!

Dopo aver fatto asciugare bene lo smalto ho applicato lo striping tape e, lavorando su un'unghia alla volta, ho applicato lo smalto nero e rimosso le striscioline.

Ho tralasciato il medio dove ho stampato, con la tecnica dell'advanced stamping, la maschera di Darth Vader.

Ho protetto tutto con uno strato di top coat.

Materiali usati:
  • Smalti: Kiko 493, Kiko Perfect Gel Duo 684 Black
  • Samlto per stamping: Born Pretty white
  • Nail stamping plate: SP-023
  • Timbrino: Born Pretty
  • Top Coat: Kiko Gel Perfect Duo
  • Pinzette
  • Striping Tape

venerdì 7 aprile 2017

Nail Crazies Unite: Boho Smoosh Manicure

Boho Smoosh Manicure
** Testo in italiano in fondo alla pagina **


Today prompt for Nail Crazies Unite group is boho manicure.

This is my first time doing this theme and I found it original.

Boho Smoosh Manicure

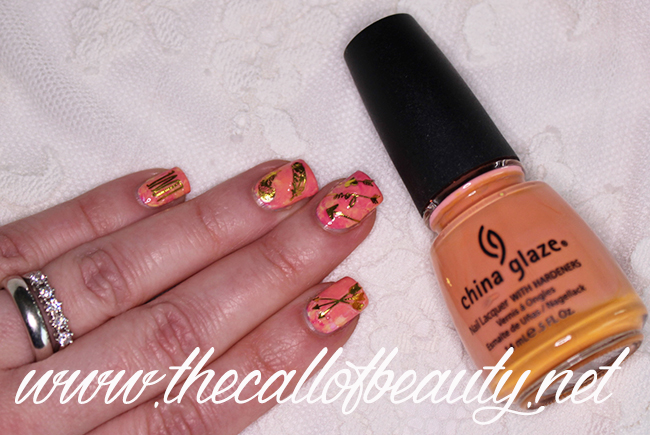
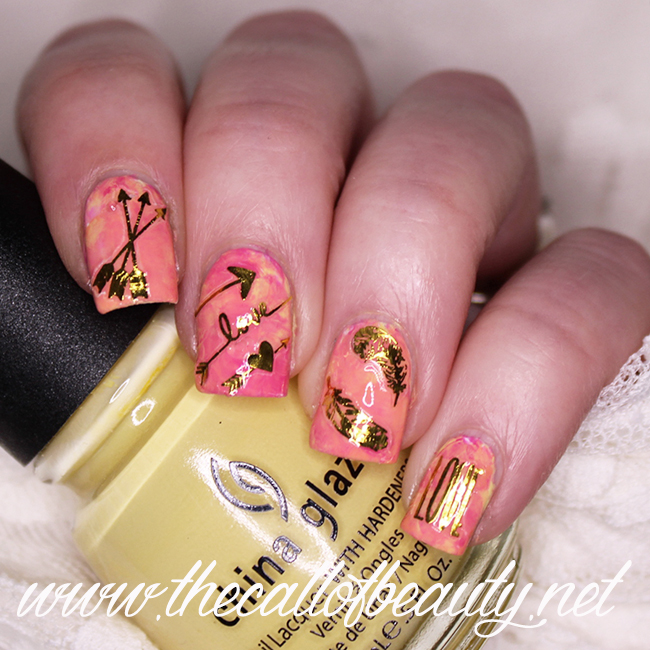
A boho theme makes me think of pastel colors and feather and arrows image.

I just bought some stickers that fit perfectly for the theme, on the back the instructions sayed that they are for gel nails, but I did two layers of top coat and they were fine on my natural nails. 😁

For my base I chose three pastel polishes, yellow, peach and pink.

Boho Smoosh Manicure


At first I would do a gradient nail art, then I decided to go for a smoosh manicure.

First of all I protected my cuticles with a peel off base.

Boho Smoosh Manicure


Then I applyed a layer of white polish to make colors pop. Then I applyed randomly some drops of my three polishes on a stamper, I mixed up with a dotter and I applyed on my nails. I used the same rotatory movement as if I was stamping. I used my sweet bunny stamper, you can find more info in this post.

I applyed top coat to smooth and even the manicure.

I applyed golden stickers

Materials:

Boho Smoosh  Manicure

  • Nail Polishes: China Glaze Snow, Lemon Fizz, Peachy Keen and Rich & Famous
  • Top Coat: Seche Vite
  • Stamper: Born Pretty
  • Nail Sticker: LC 401
  • tweezers
  • dotter
***
Boho Smoosh Manicure

Il tema di oggi del gruppo Nail Crazies Unite è manicure boho.

Per me è la prima volta che mi cimento con questo tema e l'ho trovato molto originale.

Quando penso all'atmosfera bohemienne mi vengono in mente colori pastellosi fusi tra loro e decori con piume e frecce.

Avevo da poco acquistato dei nuovi adesivi dorati adatti a questo tema, dalle istruzioni pare che siano da usare su ricostruzioni o smalti semipermanenti, probabilmente perchè hanno un pò di spessore. Io ho fatto due passate di top coat e li ho usati ugualmente sulle mie unghie naturali! 😁

Per la base ho scelto tre smalti in colori pastello, un giallo, un pesca e un rosa.

Inizialmente avrei voluto fare una base sfumata con la spugnetta, poi ho voluto provare anche io la smoosh manicure.

La smoosh manicure è una nuova tecnica molto semplice da realizzare. Per prima cosa ho protetto le cuticole con una base peel off.

Poi ho fatto una passata di smalto bianco per far risaltare i colori. Mi è bastato applicare a caso alcune gocce dei tre smalti scelti direttamente sul timbrino, mischiarli un po' con l'aiuto di un dotter e poi applicarli direttamente sull'unghia, come se stessi stampando. Ho applicato gli stickers. Le zone eventualmente disomogenee si uniformano con una passata di top coat.

Ho usato il mio dolcissimo timbrino a forma di coniglietto, se vuoi saperne di più leggi questo post.

Materiali usati:
  • Smalti: China Glaze Snow, Lemon Fizz, Peachy Keen e Rich & Famous
  • Top Coat: Seche Vite
  • Timbrino: Born Pretty
  • Nail Sticker: LC 401
  • pinzette
  • dotter